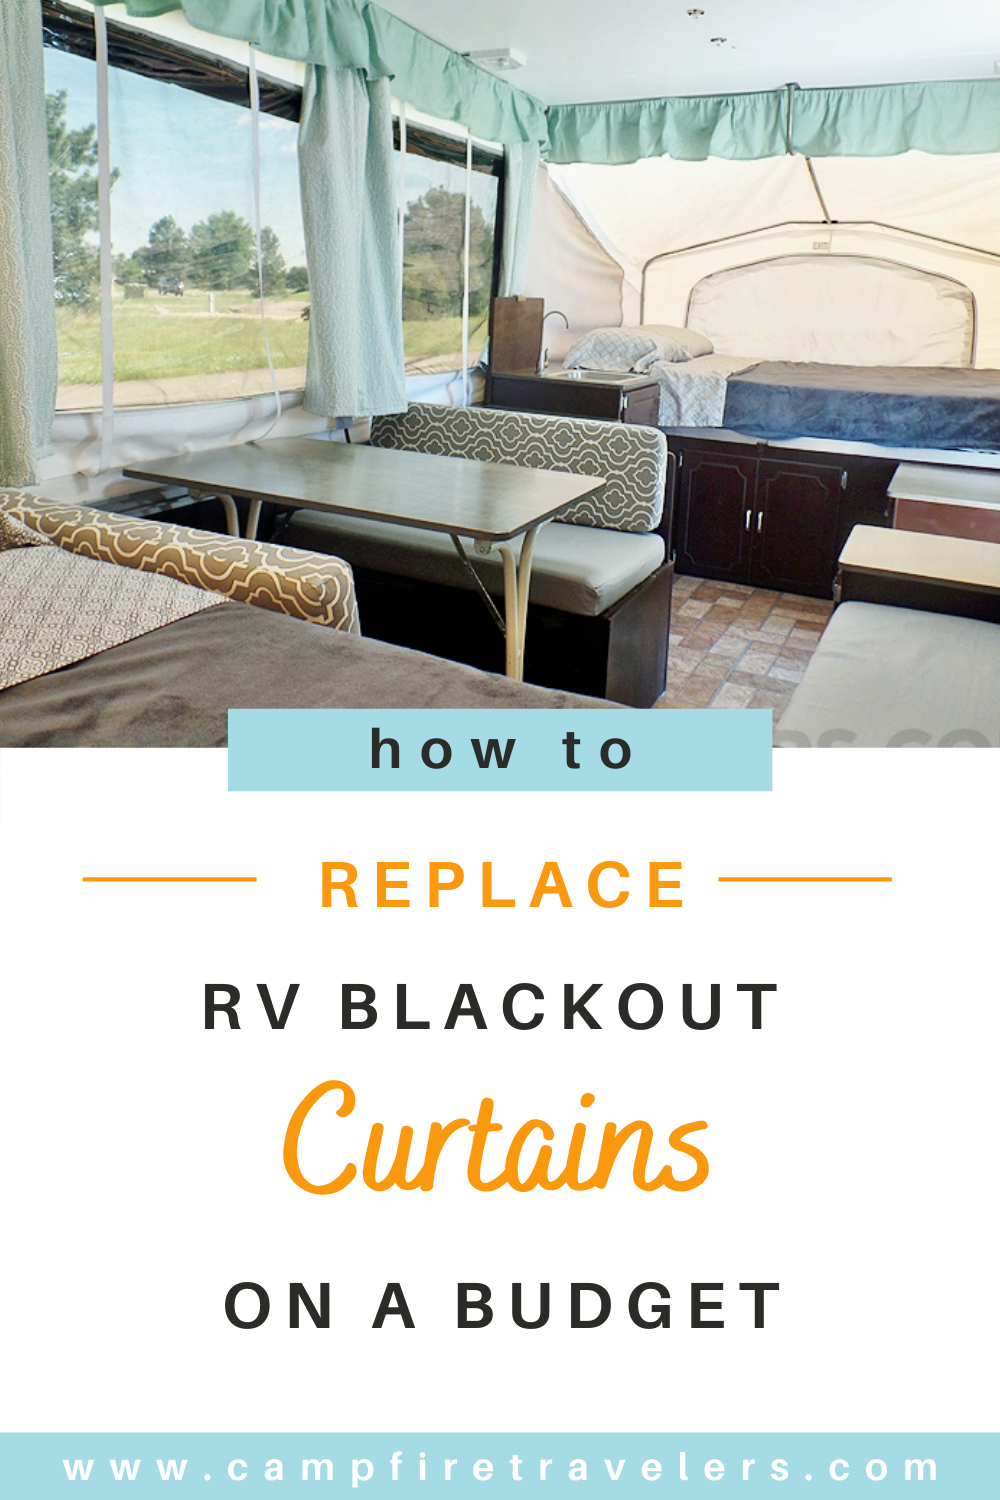
DIY RV Renovation: Curtain Replacement in a Pop-Up Camper or Airstream
Hi! Welcome to Campfire Travelers. Back in 2015, we transformed our little pop-up camper into a shining, clean, and updated home on wheels for less than $1000. We took what we learned and wanted to help others in their own DIY RV renovation. You can learn more here. And if you ever have any questions please feel free to contact us here.
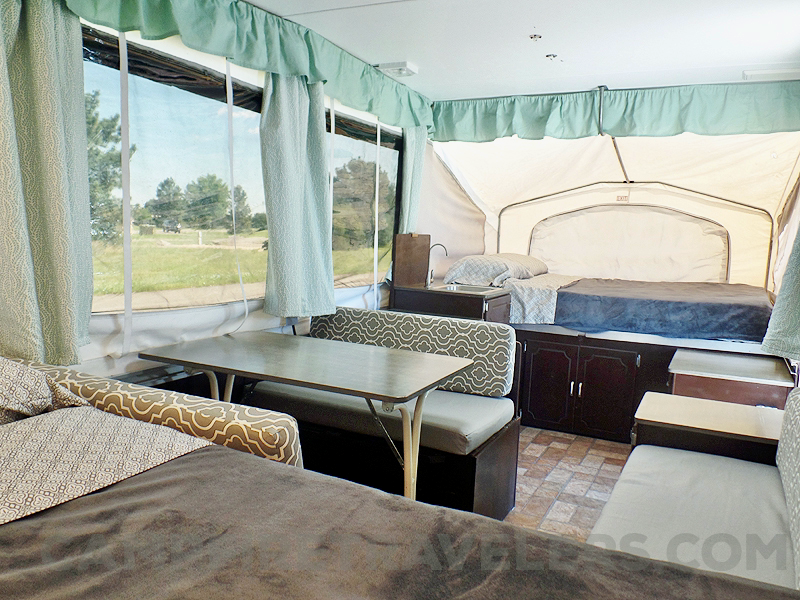
In this blog post, we are sharing our experience in renovating the curtains in our 1999 Palomino Stallion pop-up camper. From labeling and taking pictures of the old curtains to sourcing and constructing the new curtains, we share the DIY process, including the tips and tricks we learned along the way. Not to mention the challenges we faced, such as sewing through the original plastic tabs, and how we overcame those by using Airstream Drape Carriers. The final result is a beautifully finished camper interior that we are proud to show off.
*NOTE: We replaced curtains in our pop-up camper, but the same technique and tools also work for an Airstream.
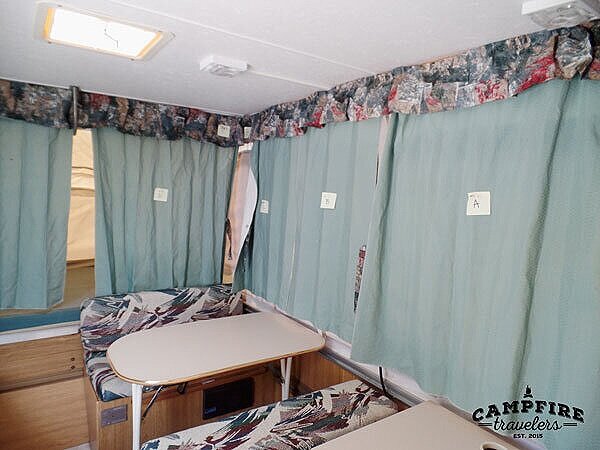
Now we can't forget how fantastic the 1999 curtains were before...
Preparation
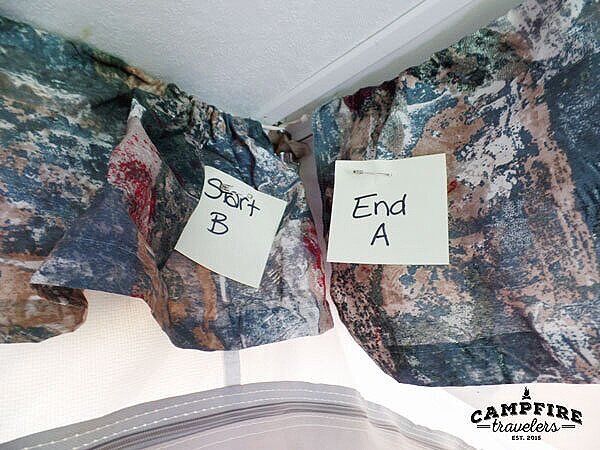
Now, I am incredibly thankful for one trick I did do before removing the old curtains and valances - I labeled them in alphabetical order and then took pictures. Because of our HOA regulations, I knew that somewhere in between the spray paint and letting the stain dry on the new counters, we would have to have the camper folded down and tucked away for a few days. So I wasn't going to be able to run out to double-check. I needed to do it all from memory and pictures. The labels saved me!
Fabric
While we were shopping for cushion fabric we had also been looking for curtain fabric. I knew we had to break away from the grays and get on board with an accent color. Luckily, the only color we could agree on was aqua, which made me very happy. But again, we couldn't agree on any fabric at the store. Until one day when I was at Wal-Mart and I passed by the sheets. Yes, sheets! It jumped out at me, the perfect aqua, not girly, with patterns, and in stock. I grabbed several sizes of their flat sheets and headed to the fabric section where I found a perfect match for a solid aqua valance. It’s like it was meant to be.

For reference, I used this blackout fabric that I purchased on the bolt at Jo-Ann’s Fabric. And I would purchase the same thing again.
Assembly
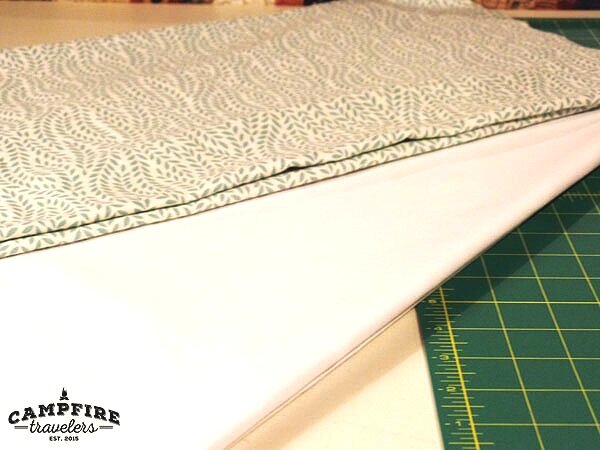
The original curtains were created with a junky blackout being adhered to the back of the fabric and then serged all around. I don’t own a serger so I knew that I would need to come up with something else.
When I started constructing the curtains I just started sewing and I didn't love the way it turned out. I really would have needed a serger and it just wasn’t in the budget or time to learn it. That’s when I changed my process and basically created a blanket for each curtain and I was so pleased in the end.
This is what I did, it is not the professional way, but it works well for us:
Measure your old curtain and add an inch to each side.
Cut one piece of new curtain fabric and one piece of blackout fabric.
Sew them with right sides together around the edges, using a 1/2 inch seam allowance
Leave a six, or so, inch section open at the bottom.
Turn the fabric right sides out through the opening, push out the corners, and stitch it closed.
PRESS the seams (this is where you get a more professional look) and then sew the rectangle again about 1/4 inch all the way around to finish
Attach curtain tabs using your old curtain as a reference
Attaching the Curtain Tabs
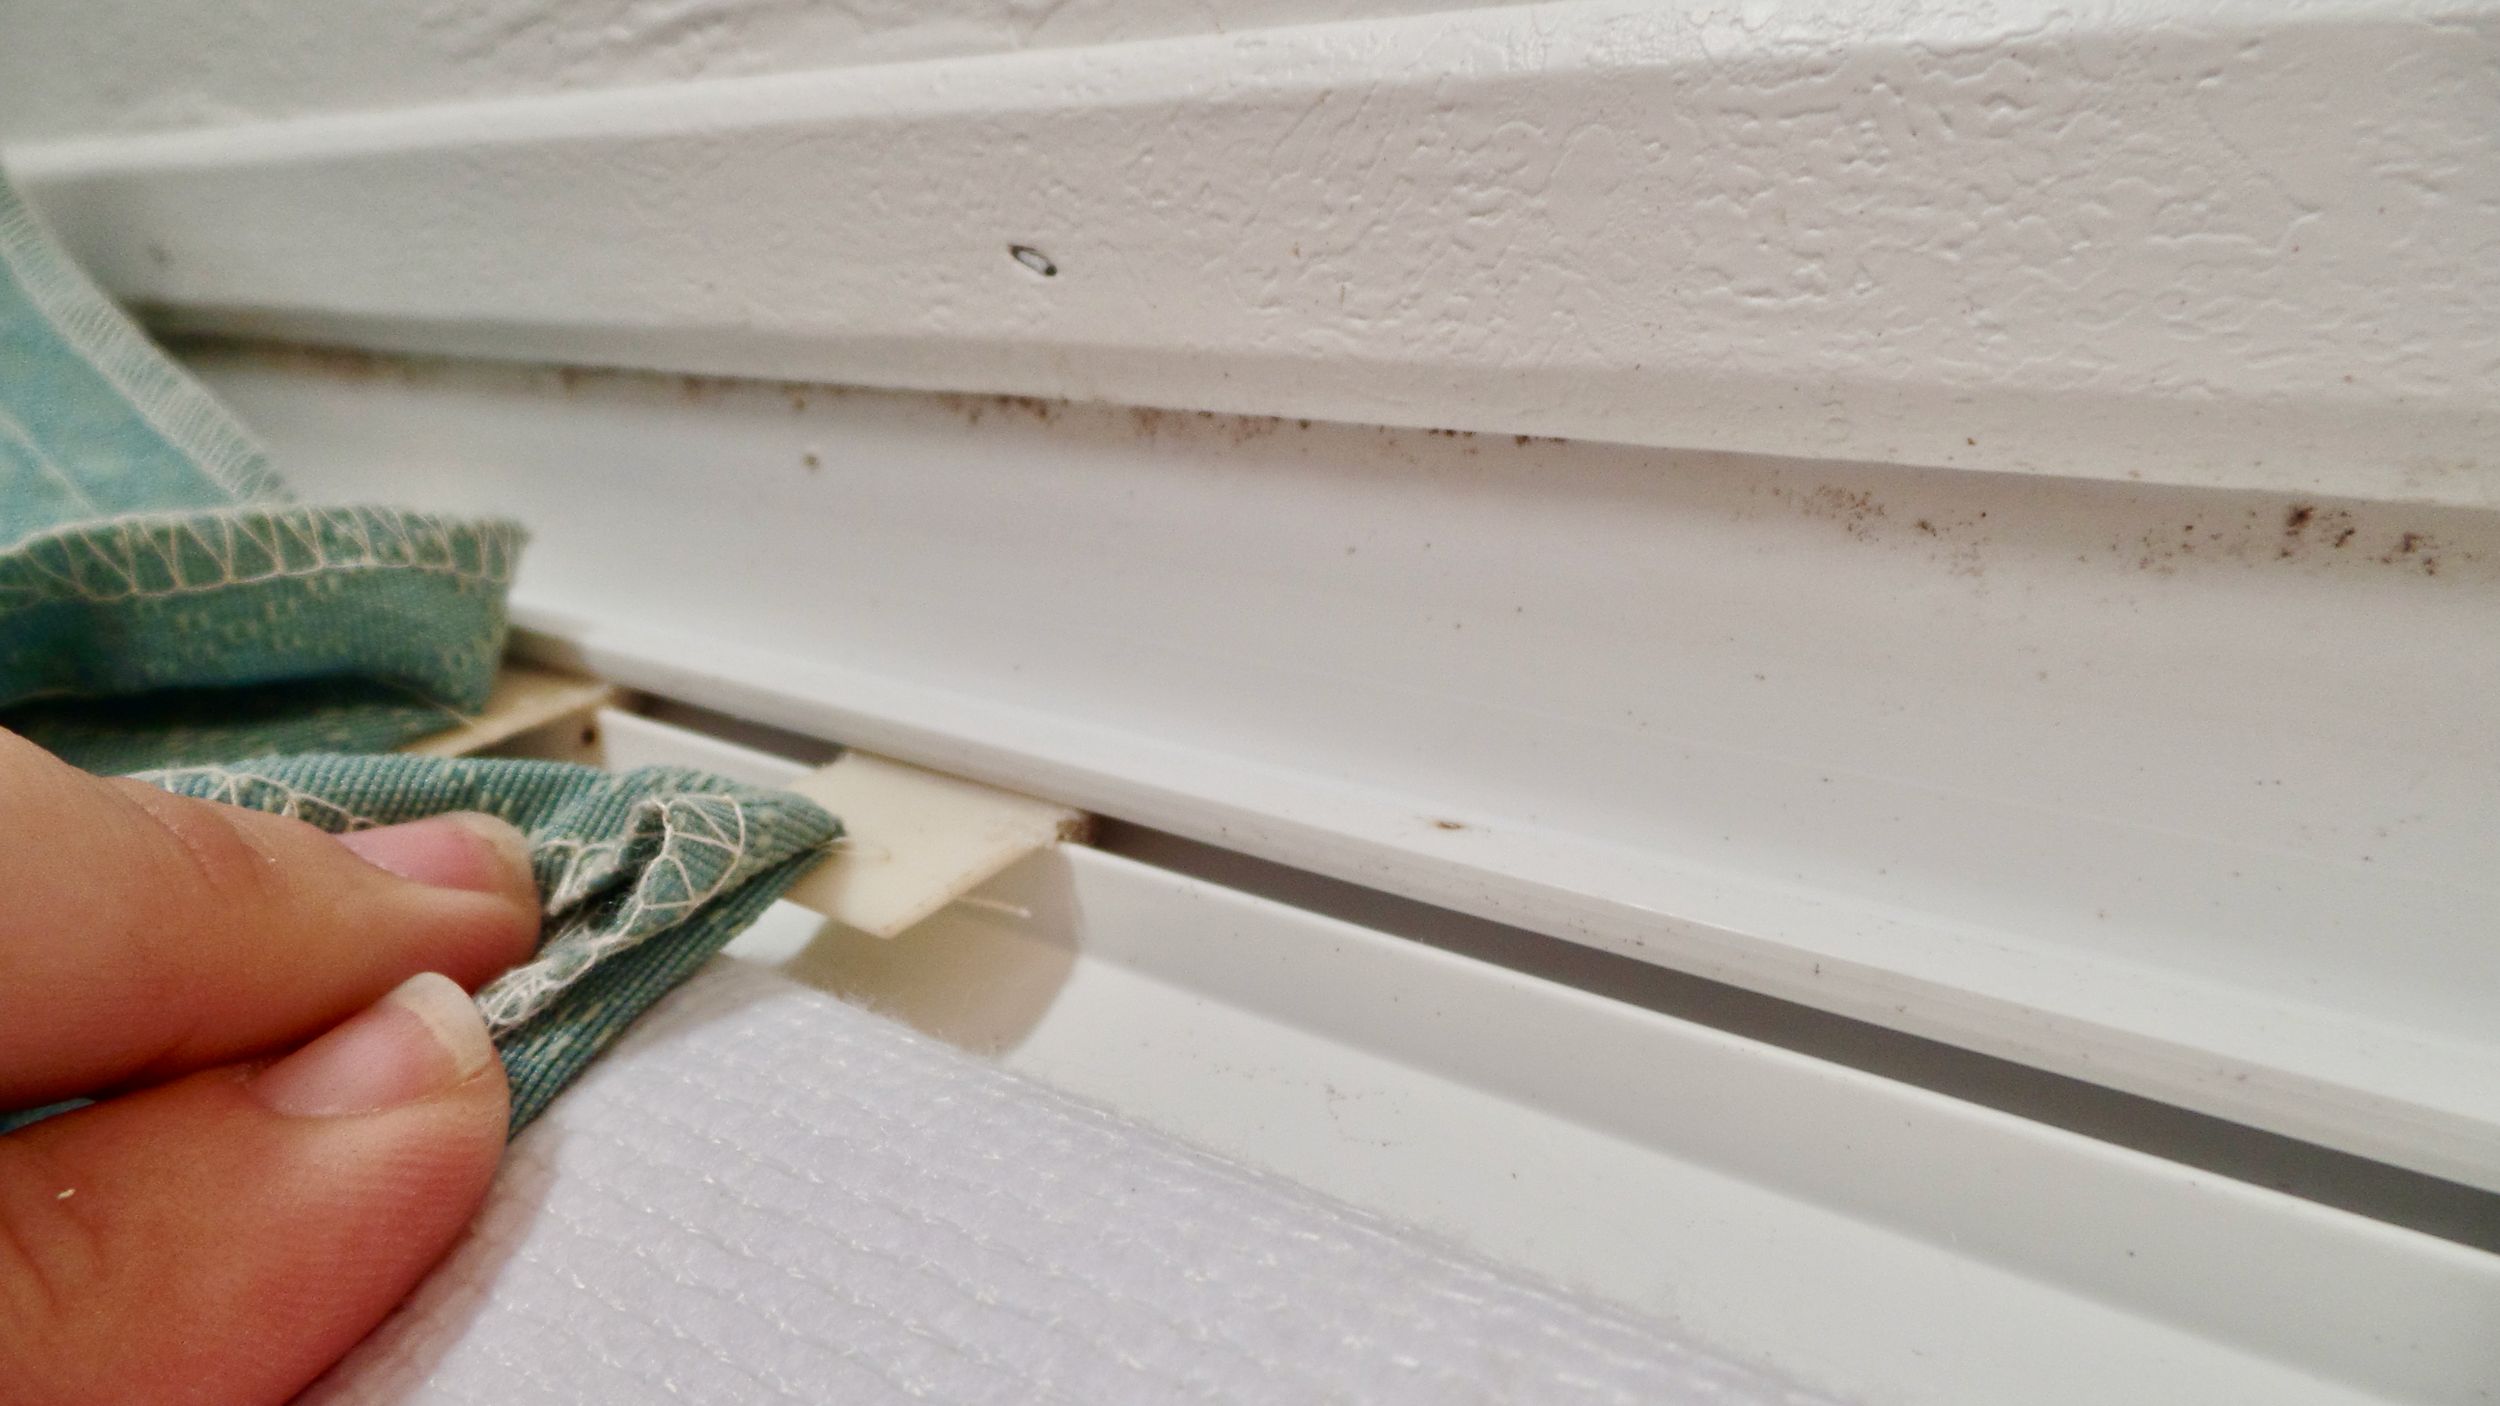
As far as curtain tabs or drape carriers go, our curtains had the plastic tabs attached. I tried my best to reuse these on the new curtains and all they did was make my sewing machine angry. I ditched the plastic tabs and turned to the PopUp Portal boards in search of suggestions and I found that many Palomino owners were able to use Airstream Drape Carriers instead. After a frantic local search, I finally got my hands on two boxes.
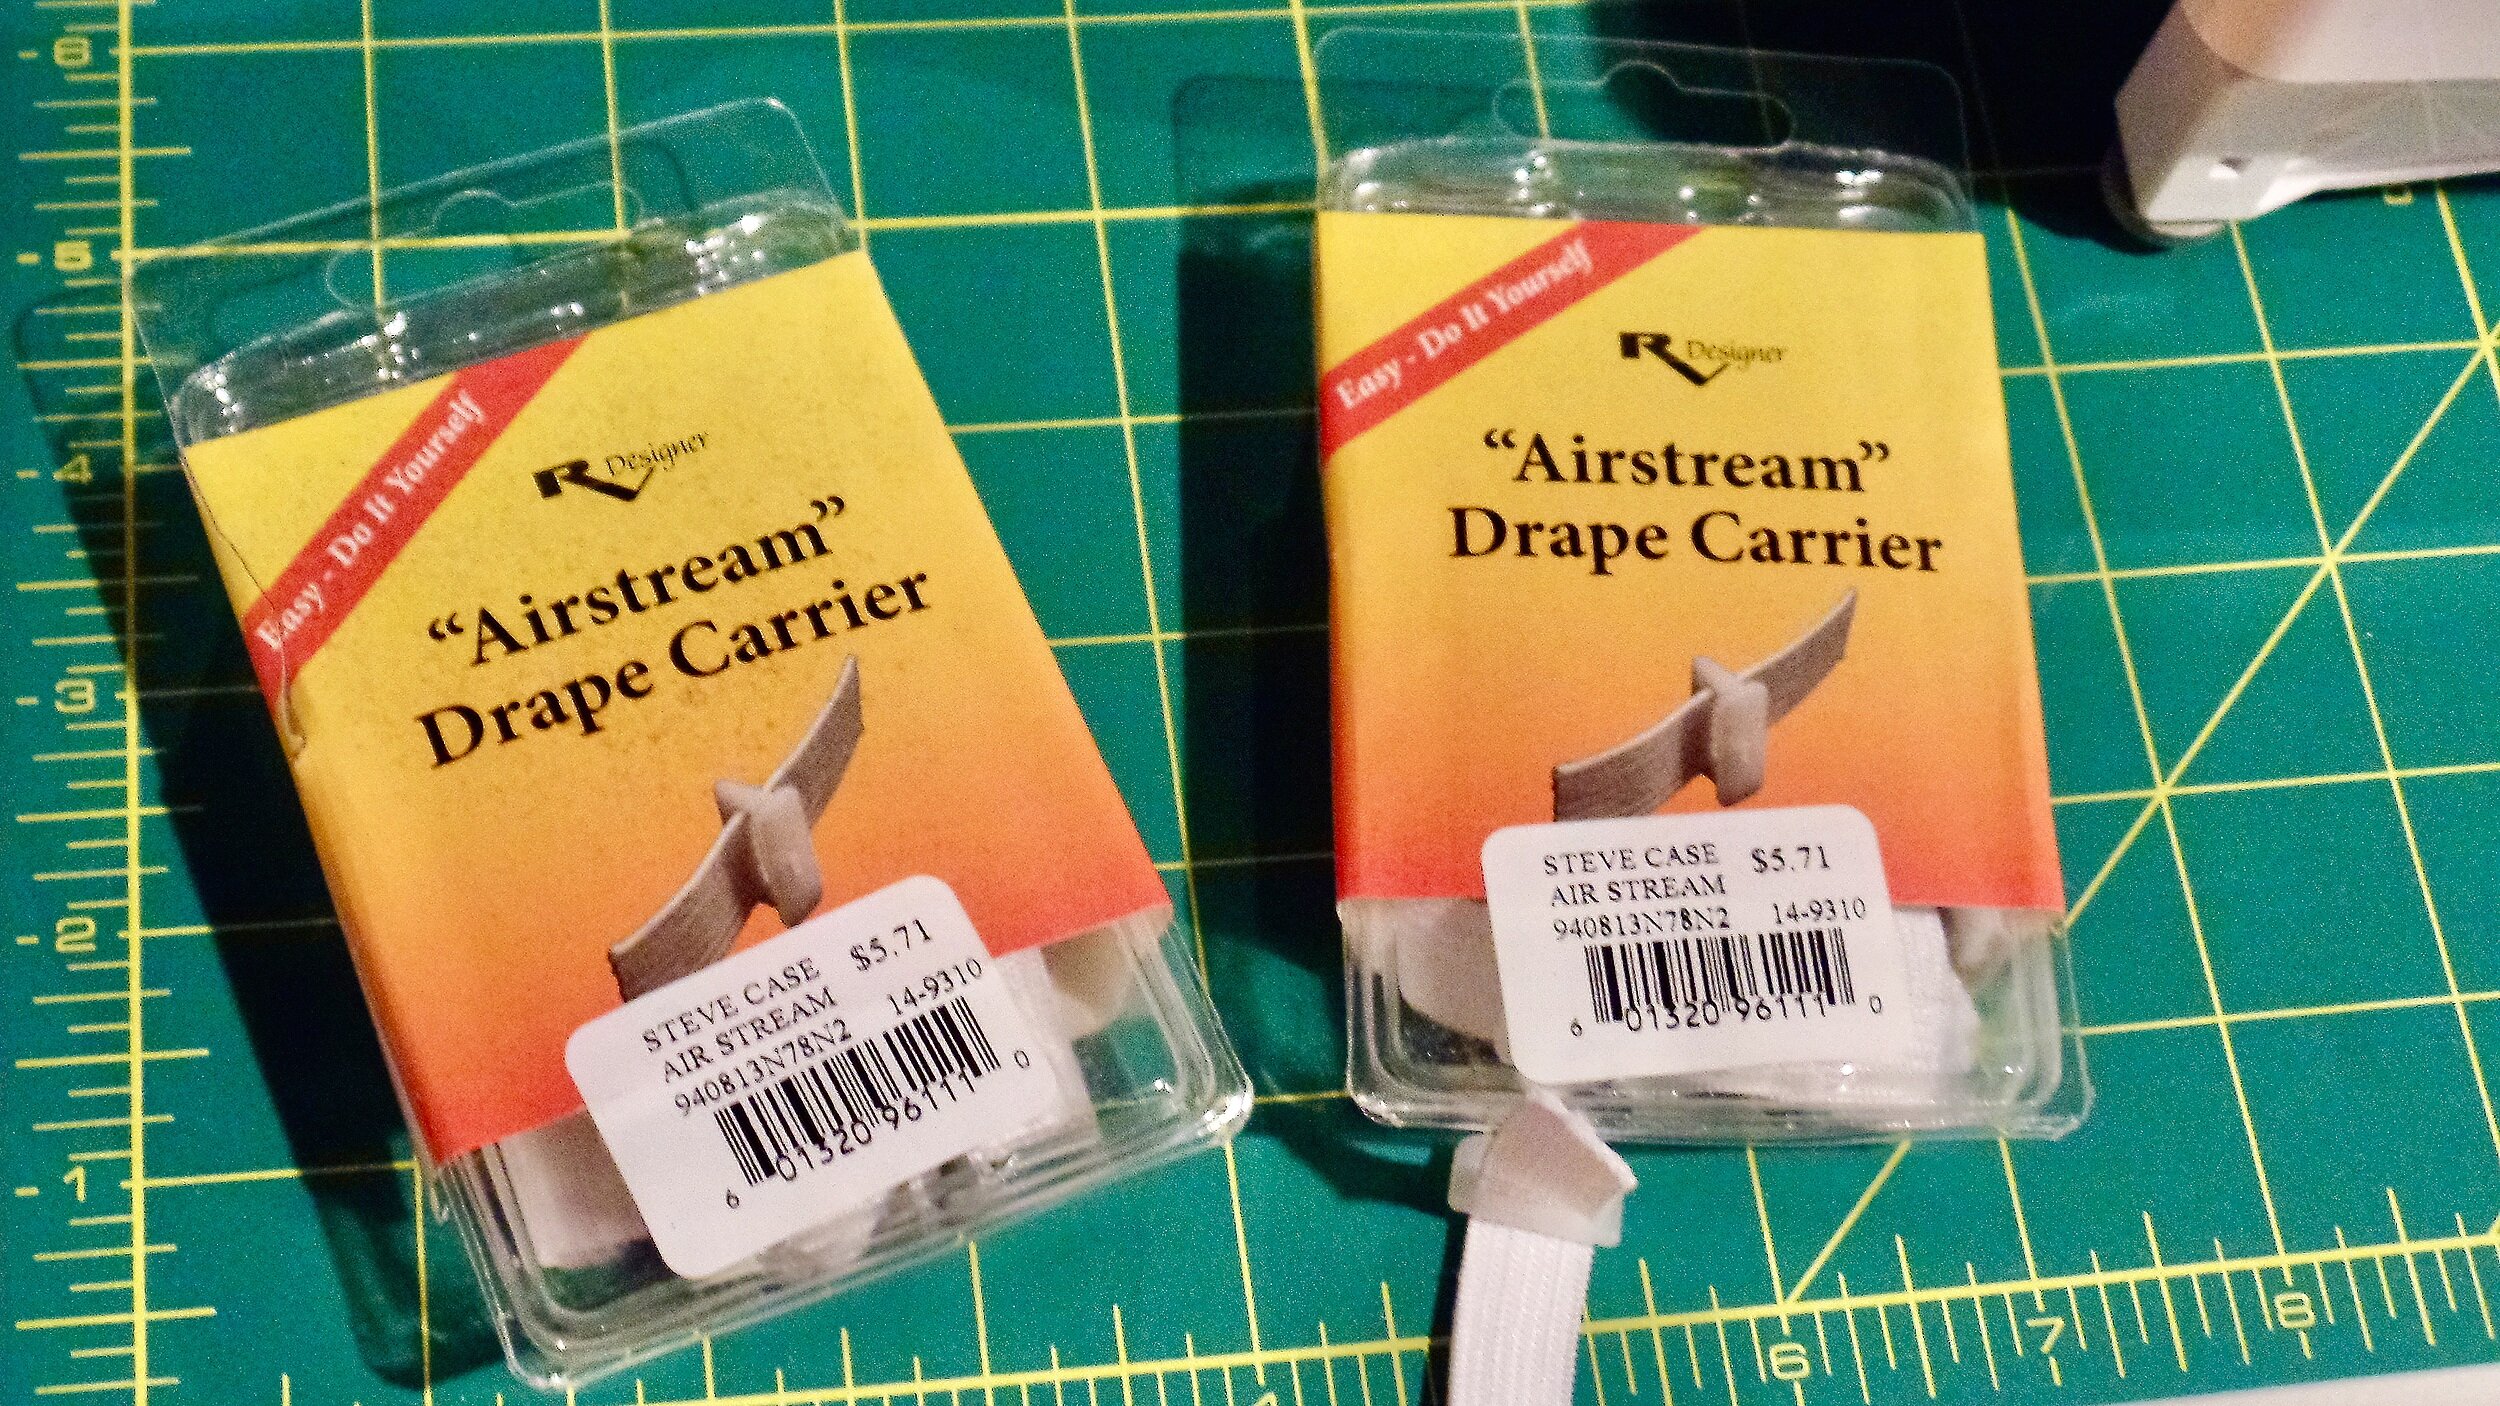

Oh my goodness!!! What an amazing difference! Instead of sewing through tough plastic I just had to sew through some elastic.
The Airstream tab, on the left, is so much easier to sew and it glides so much better in the original tracks than the plastic tab ever did. You would never know these Airstream tabs weren't the original intended tab.
With my simplified construction of the curtain and new tabs, the sewing was a breeze. As each curtain was finished I attached the same letter to the new curtain for easy installation. For the valances, I duplicated the pattern of the original and they turned out perfect. I did buy new elastic to string across the top of the camper.
When we opened the camper back up installing everything was a breeze!

Instructional Guide: DIY RV Curtain Replacement
Preparation:
Label old curtains and valances in alphabetical order and take pictures for reference.
Choose your fabric: Look for sheets or fabric that you like in a color that fits with your RV interior. You can also use blackout fabric to block out light.
2. Fabric:
Cut one piece of new curtain fabric and one piece of blackout fabric, based on the measurement of your old curtain with an extra inch added to each side.
Sew the two pieces together, with the right sides facing each other, using a 1/2 inch seam allowance.
Leave a six-inch opening at the bottom.
Turn the fabric right sides out through the opening, push out the corners and stitch it closed.
PRESS the seams and then sew around the rectangle again about 1/4 inch from the edge to finish.
3. Assembly:
Measure and cut the new curtain fabric and blackout fabric based on your old curtain.
Sew the two pieces of fabric together with right sides facing each other, using a 1/2-inch seam allowance.
Leave a six-inch opening at the bottom and turn the fabric right sides out through the opening.
Push out the corners, stitch the opening closed, and press the seams.
Sew the rectangle again about 1/4 inch from the edge to finish.
Attach the curtain tabs using the old curtain as a reference.
4. Attaching the Curtain Tabs:
You can reuse the plastic tabs from the old curtains or use Airstream Drape Carriers instead.
Sew the tabs to the new curtains and attach the same letter for easy installation.
Duplicate the pattern of the original valances and use new elastic to string across the top of the camper.
Installing the new curtains and valances is easy using your alphabetical labels!
Enjoy your new RV curtains!
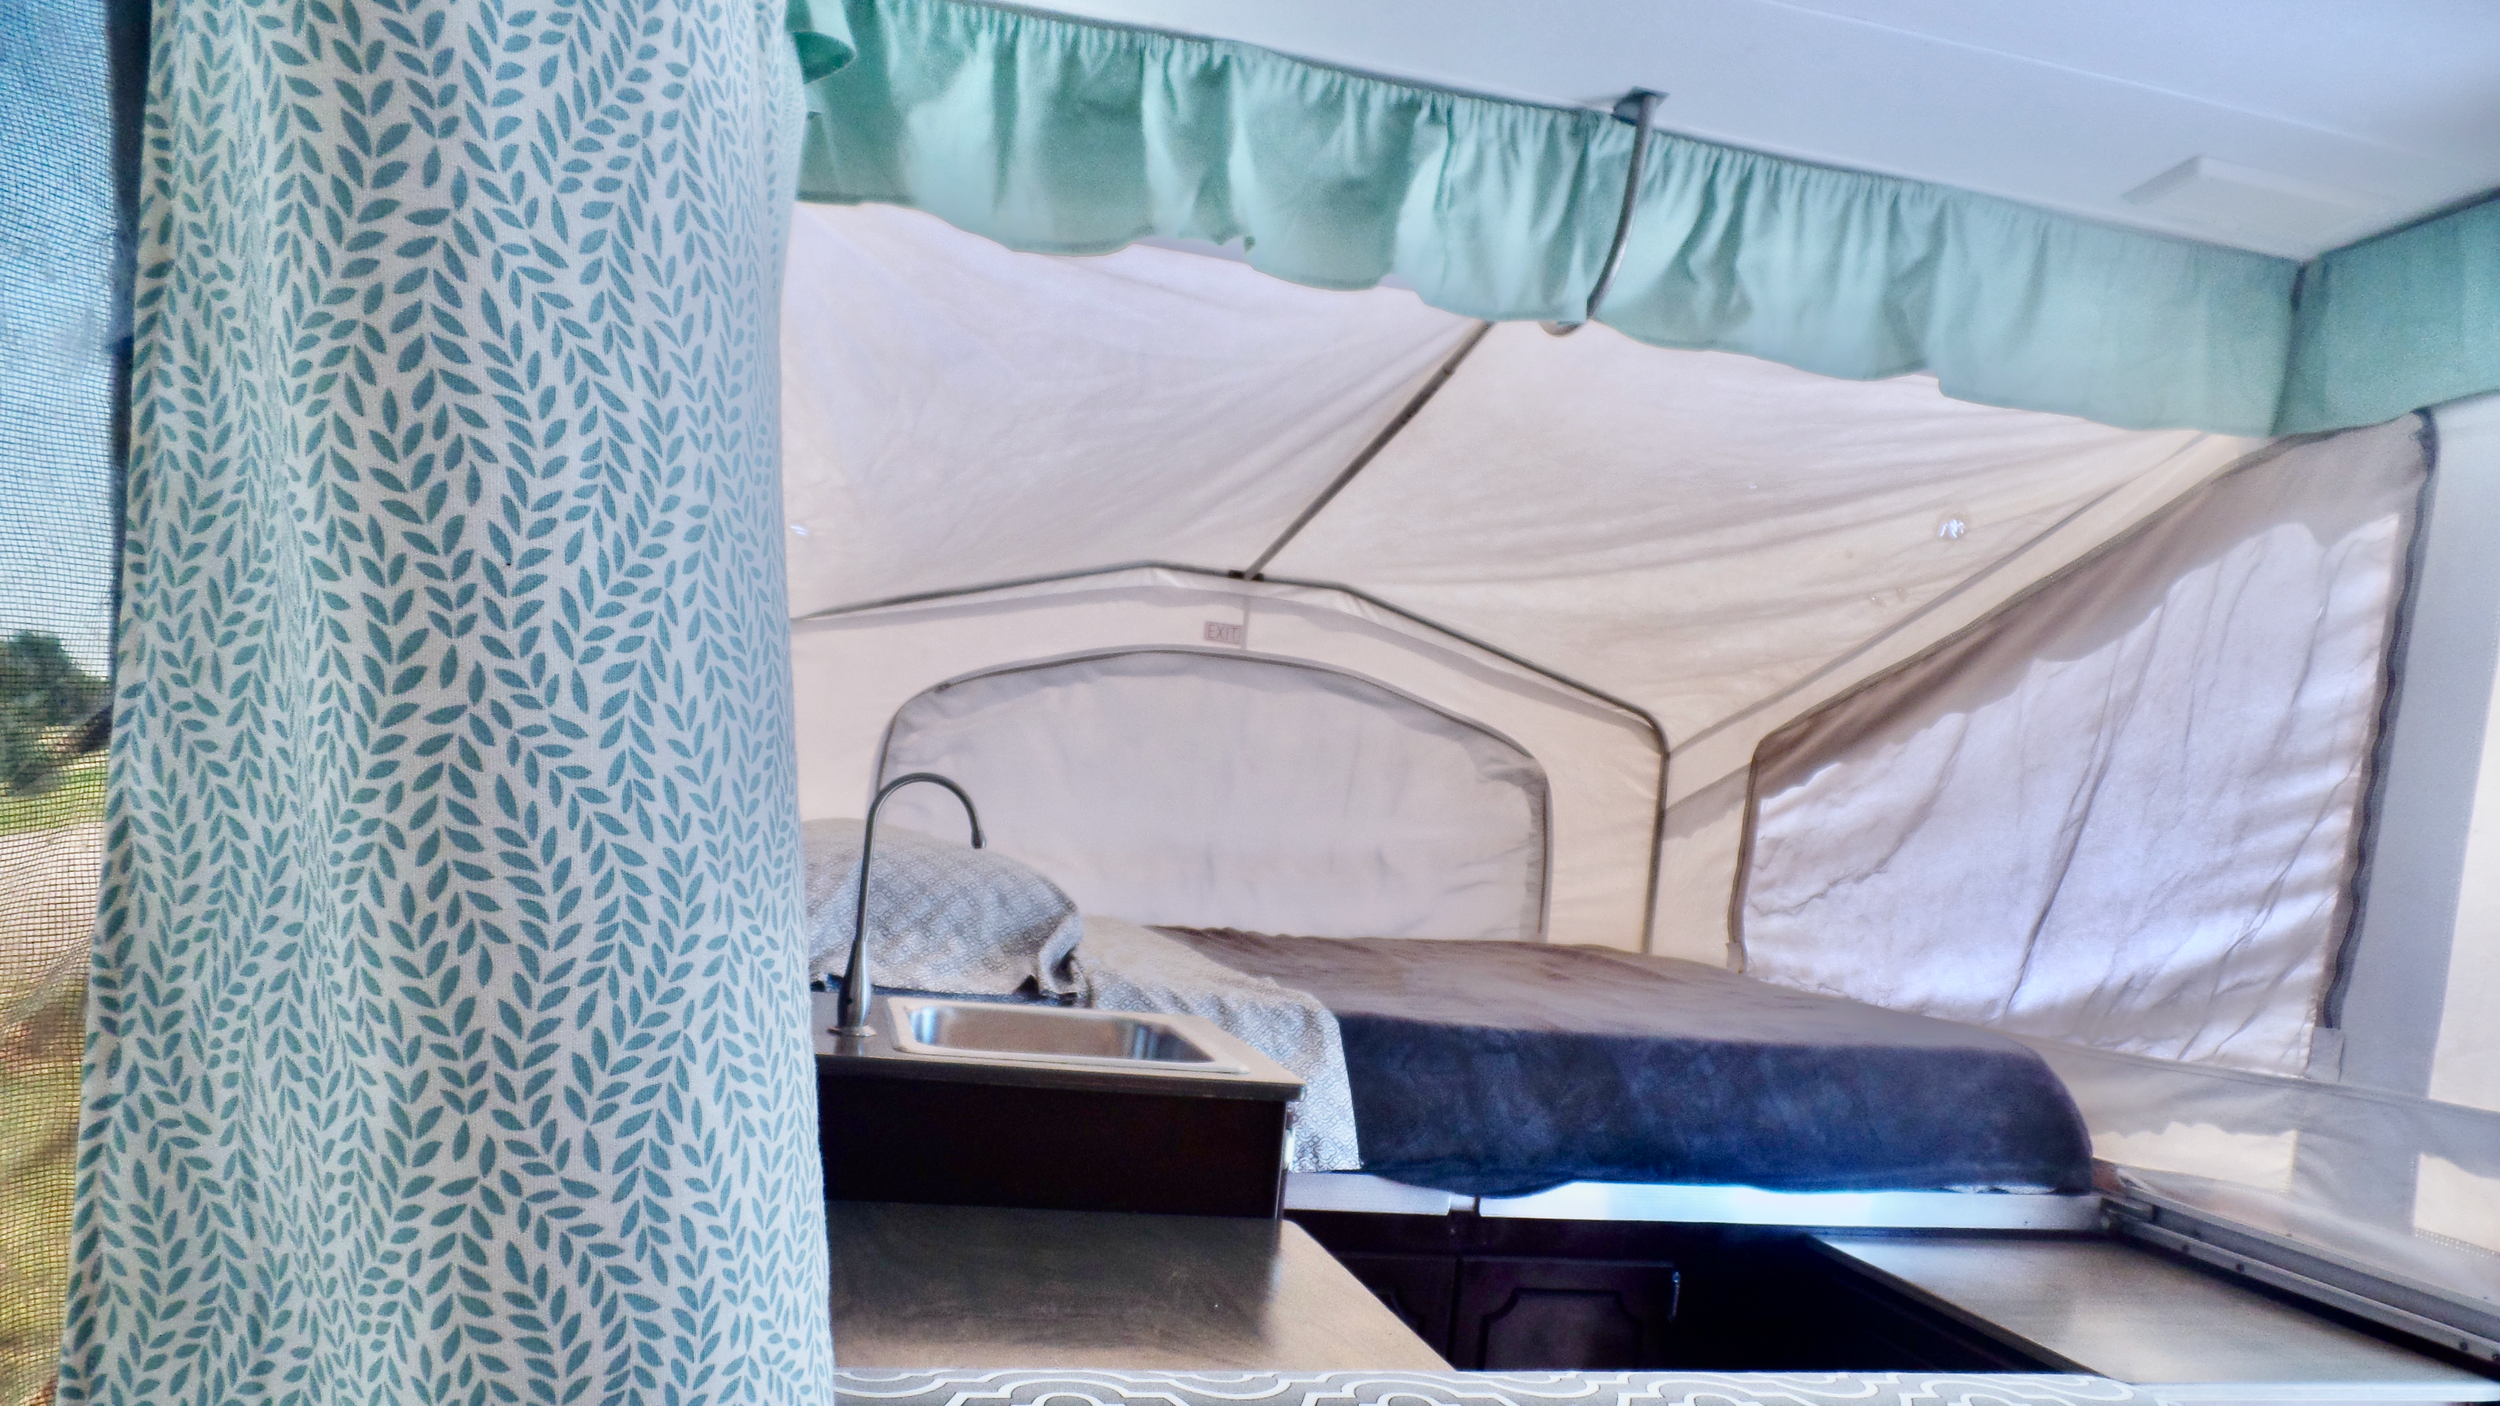
With the curtains done we have just a few more small projects to finish sprucing up the interior. We'll talk about those next time. For now, I'll just sit here and enjoy all this hard work. Can you believe it? We have made it to the last BIG update on our 1999 Palomino Stallion pop-up camper! The curtains! Now while we still have a few more little items here and there, the list is much smaller. The new curtains gave it all a nice finishing touch and we were finally able to stand back and let it all sink in.
If you’re curious about how we renovated any other parts of our 1999 Palomino pop-up camper please check out the links below or visit our main page here.
The BEST way to clean the canvas
Why we painted the furnace cover
Creating new blackout curtains
Creating a new nightlight and replacing outlets
And if you ever have any questions, please feel free to check out our FAQ to contact us or leave a comment below!